Saturday, July 25, 2015

VEGAN COCONUT-LIME BANANA BREAD

I think I could live off of banana bread...and chocolate :).  I came across a recipe for a coconut lime banana bread and I was very intrigued by the flavor combinations.  After some testing I quite happily arrived at this very moist and delicate version.  Somewhere between a banana cake and bread I hope you enjoy it as much as I do!  EQUIPMENT: high-speed blender, 2 8x3 (preferably nonstick) bread pans, parchment paper if not using nonstick YIELDS: 2 loaves that take 1 hour to bake


INGREDIENTS

WET:
6 very ripe medium bananas (the spottier the better), chopped
1 cup coconut milk (if you can make your own DO IT!)
juice of 4 very juicy limes
zest of 1 lime (for a super lime flavor zest 2 but make sure not to zest the white pith as your bread will be bitter)
4 Medjool dates or 4 Tbsp liquid sweetener (preferably coconut nectar)
1/4 cup melted coconut oil
2 Tbsp Madagascar vanilla

DRY:
2 cups Bob's Red Mill Almond Meal/Flour
1 cup finely shredded unsweetened coconut (I buy the reduced fat one)
2 tsp baking powder
1 tsp baking soda
1/2 tsp sea salt
1 Tbsp chia seeds

GLAZE:
juice of 2 limes
1 Tbsp coconut nectar (or other liquid sweetener)
1-2 Tbsp shredded coconut for garnish


Preheat oven to 375.  Add all wet ingredients to blender. If you like your bread to have little bits of banana in it, just pulse blender until desired consistency still making sure everything is well blended.  Pour into large bowl and set aside. Meanwhile, in a medium bowl thoroughly mix all dry ingredients together, even using your hands.  It's very important to evenly distribute all ingredients.  You'll then want to stir the dry ingredients into wet in about 4 takes making sure to thoroughly stir after each addition.  If you are not using nonstick pans make sure to line the bottom of each with parchment paper.  Nonstick or not make sure to lightly grease the pans with coconut oil on the bottom and sides.  Evenly pour batter into both pans and place in oven side by side.  Meanwhile, prepare glaze in a measuring cup and stir well.  Set aside.  

After about 25-30 minutes you'll want to tent each loaf with foil to keep from burning.  My loaves took about one hour but I would suggest checking your loaves at 50-55 minutes with a toothpick.  If they come out clean they are done!  Remove from oven and place on cookie rack or on stovetop.  Remove foil and poke a few, deep holes with toothpick in both loaves.  Evenly distribute the glaze over both.  Now here comes the tricky part: LET THE BREAD REST IN THE PAN FOR AN HOUR! If you remove them too soon they will fall apart.  After an hour I flipped each loaf upside down on my hand and then flipped right side up onto a serving dish.  I then sprinkled with about a tablespoon of shredded coconut.  Cut pieces into desired thickness and enjoy!


Tuesday, July 21, 2015

RAW VEGAN MINI PEANUT BUTTER CUPS

These are my raw, gourmet and SIMPLE version of the beloved Reese's Peanut Butter Cup! I will say these are quite rich and you may find you are satisfied with just a half.  That's the beauty of raw desserts as they leave you satisfied without weighing you down.  Enjoy!  YIELDS: 12 mini cups


INGREDIENTS:

1 12 mini cupcake tin
12 mini cupcake wrappers
1/2 cup melted coconut oil
1/2 cup coconut syrup ( I have not tried these with other liquid sweeteners)
3/4 cup cacao powder (If you want a less rich, chocolate taste use 1/2 cup)
12 teaspoons balled natural peanut butter
1 Tbsp vanilla
Flaked Sea Salt (aka Fleur De Sel) to sprinkle on top


Line muffin tin with liners.  Either melt coconut oil on low heat over double boiler if you are a true raw foodist or in the microwave in a measuring cup.  Then add coconut syrup, cacao powder and vanilla.  Stir vigorously until well combined and all lumps are gone.  Fill each liner halfway with liquid cacao.  Then add 1 balled peanut butter to each cup pushing slightly down on it.  Then pour remaining cacao over each cup up to the top.  Sprinkle each cup with a pinch of flaked salt and put in fridge.  If you have absolutely no patience they will be set in a half an hour but best to wait an hour!  Store in fridge or freezer.  

Thursday, July 2, 2015

VEGAN BLUEBERRY CORNMEAL CAKE

If you are looking for the perfect cornbread on you picnic table you have come to the right place!  I wanted to create something in between a cornbread and a cornmeal cake and I was able to achieve it nicely.  The secret is using just enough sweetener to bring out the natural sugars in the blueberries and fresh corn.  Not too sweet, moist and fulfills both sweet savory discerning palettes!  EQUIPMENT: 13x9 baking pan


INGREDIENTS:

2 1/2 cups Bob's Organic almond meal/flour
1 cup Bob's Organic cornmeal
1 tsp baking soda
1/2 tsp baking powder
1/2 tsp fine sea salt
2 cups coconut milk (I made my own but you could use boxed)
1/2 cup medium grade maple syrup (or any grade you prefer)
2 tsp vanilla
1 tsp fresh lemon juice
1/4 cup melted coconut oil
1 cup fresh corn kernels (frozen if you need to)
2 cups fresh blueberries (frozen if you need to)


1.)  Preheat oven to 350.  Mix all dry ingredients in a large bowl, stir well and set aside.

2.)  In a medium bowl mix coconut milk, maple syrup, vanilla, lemon and melted coconut oil.

3.) Slowly mix dry into wet and stir until just incorporated.  Then fold in corn and blueberries.

4.)  Lightly grease a 13x9 (preferably nonstick) pan with coconut oil.  If not using nonstick I would recommend lining the bottom with parchment paper and then greasing.  Pour cake batter into pan and smooth the top with a rubber spatula. Bake cake for approximately 50 minutes. NOTE: About halfway through I lightly covered with foil so it wouldn't brown too much.  Start checking at the 40 minute mark with a toothpick.

5.) Take cake out let COOL, COOL AND COOL; I can't emphasize this enough!  This is a very delicate and moist cake that needs time to set.  If you have the patience let cake sit for an hour before cutting into squares.  You can make squares as small or big as you like.  Would be adorable to serve in a cloth lined basket on a picnic buffet table!  


Saturday, June 27, 2015

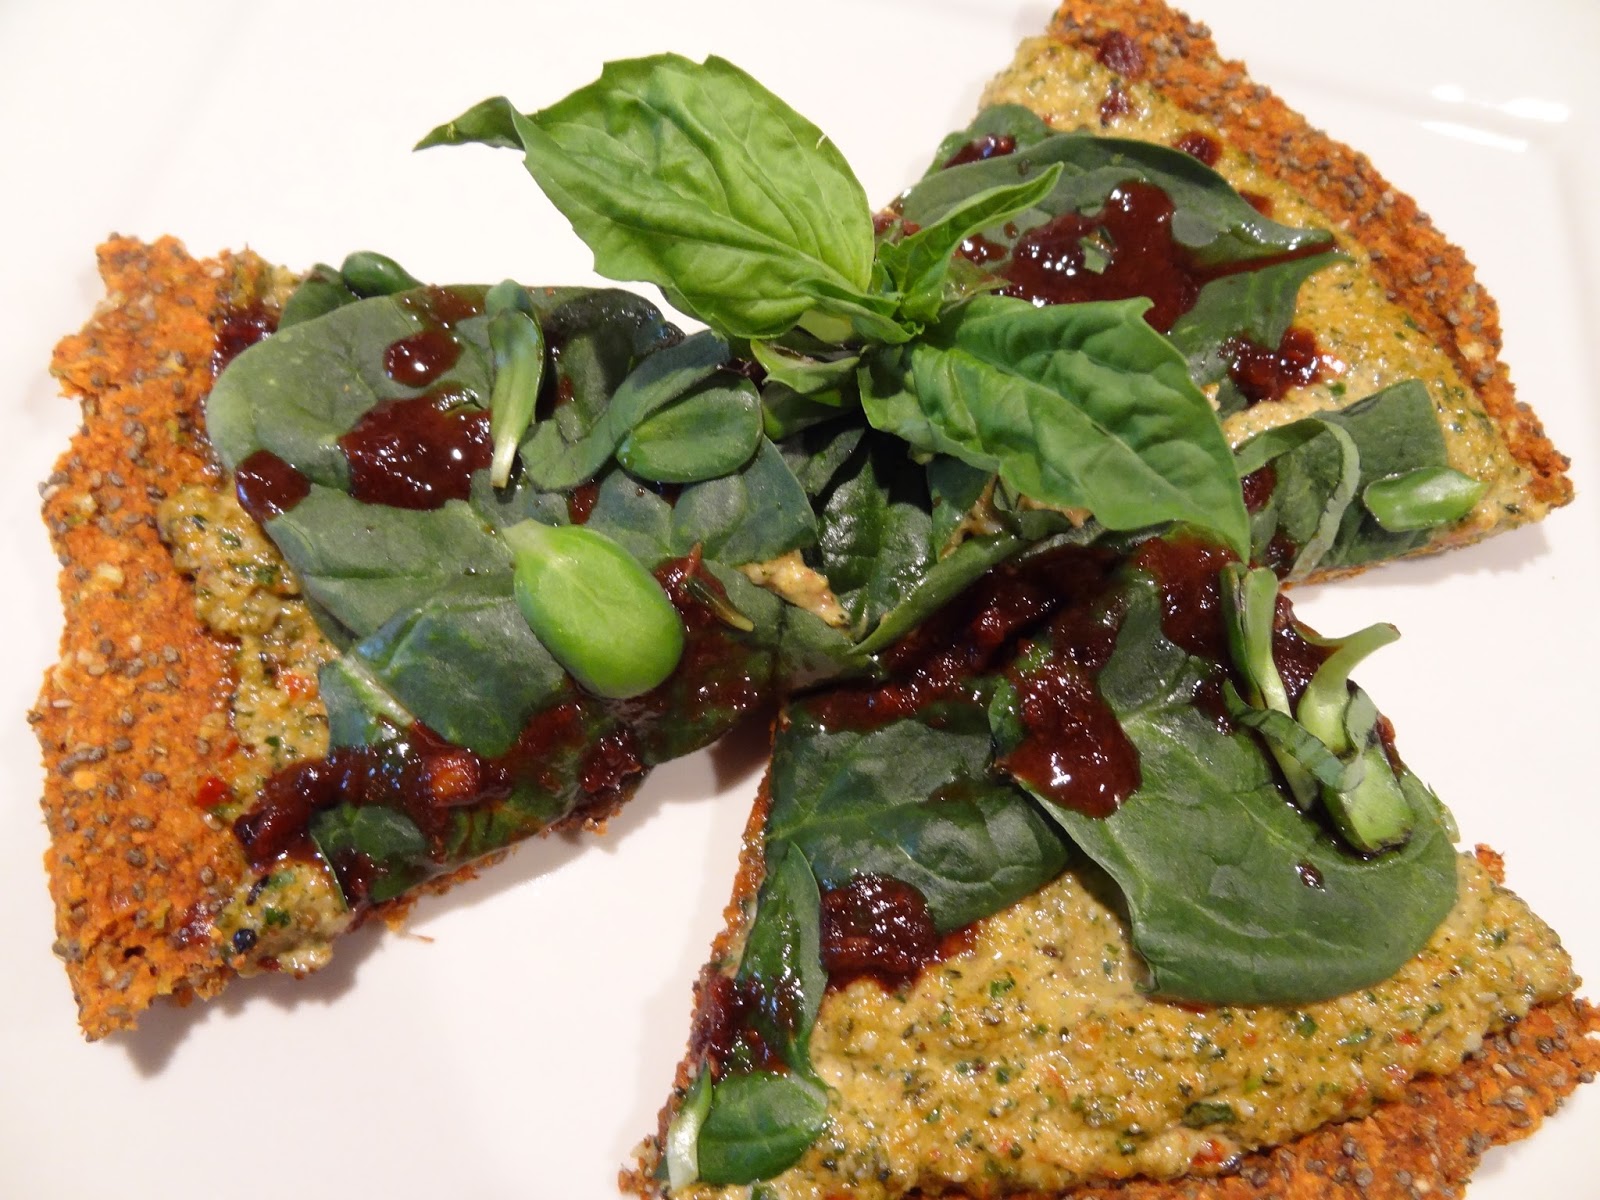
RAW VEGAN SWEET POTATO CHIA SEED PIZZA CRUST

I know cauliflower crusts are all the rage today but sweet potatoes make a great crust too!  I did dehydrate the crust but you could certainly put this in the oven too.  (I will give specific oven instructions below.)  This yielded a slightly sweet and crunchy crust that will delight all tastebuds. EQUIPMENT: food processor


INGREDIENTS:


3 cups of grated sweet potato
2 Tbsp of chia seeds mixed with 6 Tbsp of water 
4 cloves of garlic, chopped
2 large scallions (white and light green parts only) chopped
1 tsp garlic powder
1 tsp chili powder
1 tsp dried oregano
1/2 tsp fine sea salt


INSTRUCTIONS:


1.)  Mix chia seeds with water and stir well to set aside.  Meanwhile, grate sweet potato on box grater or using the grater disc on food processor.  Add to food processor along with everything else and process until well combined.  It's ok if you still have larger pieces of scallion or sweet potato not thoroughly processed.  


2.)  You'll then want to put dough onto a teflex lined dehydrator tray and form into a circle about 10-12 inches in diameter and a 1/2-inch thick.  I formed it like a deep dish pizza crust almost pushing up the sides and keeping it a bit thinner in the middle.  I then dehydrated at 145 degrees for a half hour and then turned it down to 115 for about 20 hours. *Please note, it came out very crunchy!  The reason for doing so is when you spread your pesto, sauce, etc it will soften the dough a bit.  So just like a real pizza it's a bit "doughy" with a crust that still has crunch!


*If using an oven it's very important to let the crust dry out a bit first before putting into the oven.  I would form it into a circle as stated above and let sit in the fridge for a few hours if not overnight.  Too much water will not yield a crunchy crust!  Additionally, if you do not have a cookie sheet that can accommodate the above dimensions simply make two pies that are 6-inches in diameter on a parchment lined cookie sheet.  After it has dried out I would bake it at 450 degrees for 10-15 minutes and then 400 degrees for however long it takes to achieve the crunchiness you desire.  My guess would be another 20-30 minutes but keep checking!  Add your favorite toppings and enjoy!


Friday, May 29, 2015

SUMMER PEACH AND NECTARINE SALSA

It 's my favorite time of year with all the luscious, summery fruit available and peaches and nectarines are some of my favorites!  Have you ever been peach picking?  There is NOTHING like eating a peach picked straight from the tree and having all of the juices drip down your chin-so good!  I love making a great mango salsa but if I can use the bounty of the season, I will.  This would be a great accompaniment to any summer feast.  If you're having a picnic or bbq just set a nice bowl of this out and your guests will pile it on their plates!  YEILDS: 2-3 cups


INGREDIENTS

3 peaches (I used white) finely chopped
2 nectarines (I used yellow) finely chopped
1 red bell pepper (finely chopped)
1 medium jalapeno pepper (minced) 
1/2 cup red onion (finely diced)
juice of 1 orange
juice of 3 limes
1/2 cup finely chopped cilantro
2 Tbsp chiffonade fresh mint (don't skimp on this!)
1 tsp fine sea salt
few sprinkles of cayenne if you want more heat


If using white peaches try to use yellow nectarines and vice versa.  It's nice to have the juxtaposition in flavor and aesthetics.  Add everything to a bowl and simply lightly toss with a spoon to make sure everything is coated evenly.  Check for seasoning as you should be able to taste each individual ingredient.  Adjust accordingly and enjoy!


Tuesday, May 26, 2015

COLD, ASIAN PASTA SALAD WITH A SESAME-GINGER JALAPENO DRESSING

I love cold pasta salads, don't you?!  They're especially nice this time of year in the heat.  This makes a wonderful, easy weeknight meal, a great potluck dish and a nice bring a long to a picnic!  I use lentil pasta in this dish which is a fairly new item in the market.  It has a great amount of protein and fiber, more than even a brown rice pasta.  If you can seek it out, go for it.  If not, any pasta you have is just fine.  


INGREDIENTS:

DRESSING:
1/2 cup Coconut Aminos (Coconut Secret is the brand)
1 heaping tablespoon of Coconut Syrup ( same brand as above or favorite liquid sweetener)
1 teaspoon Toasted Sesame Oil
Juice of one Orange
Juice of 3 limes
1 tablespoon Red Pepper Flakes
2 Scallions chopped (2 white and light green parts only)
1 1/2 Tablespoons of grated ginger
1/4 of 1 jalapeno, chopped
1 teaspoon sweet miso paste (optional but good)
1 teaspoon fine sea salt


VEGGIES
1 red and yellow bell pepper thinly sliced into one-inch pieces
1 cup snow peas cut vertically in 1/4-inch pieces
1/2 cup finely chopped red cabbage
1 cup chopped fresh baby spinach
2 thinly sliced scallions
1 box of your favorite gluten-free pasta ( I used Lentil pasta shaped like Rotini but a brown rice pasta would work well too)
Toasted Sesame Seeds for garnish


Cook pasta according to box but keep it al dente, which would be on the lower cooking end of the cooking time suggested.  Make sure to rinse under cold water after you drain it and set aside.  As pasta cools in the colander, simply add dressing ingredients to a high-speed blender and blend until thoroughly combined.  Check for seasonings.  If  you like it hotter add more jalapeno and/or ginger.  If you like it sweeter, add a touch more liquid sweetener.  Transfer cooled pasta to a bowl and add the dressing and mix thoroughly.  Once combined add remaining scallions and sesame seeds.  Tastes even better when it has been chilled a few hours!


Thursday, April 2, 2015

PASSOVER KUGEL

I absolutely LOVE, ADORE, CHERISH (you get the idea),  Kugel!  If you haven't heard of Kugel let me explain the goodness you are missing out on.  It is a traditional, sweet noodle pudding served at most Jewish holidays. Usually made with egg noodles, sour cream, eggs, cottage cheese, milk, sugar, apricot preserves and cinnamon...basically everything bad for you!  I have developed a fantastic vegan, gluten-free and low fat version using brown rice pasta and honestly, it tastes just like the real thing!  Seriously, I would never feel like I was missing out on the "real thing" eating this.  Jewish or not, you need to try this recipe!  SERVES: 9


INGREDIENTS:

1 10oz package of brown rice spaghetti or brown rice pad thai noodles
1 cup fresh made or boxed coconut milk (feel free to use unsweetened almond milk)
1 medium white sweet potato baked (or regular if can't find white), cooled and skin removed 
3/4 cup dried unsulphured apricots, divided
1/2 cup Medjool dates
2 Tbsp best quality vanilla extract
1 1/2 tsp cinnamon, divided
1 tsp sea salt
1 Tbsp fresh squeezed orange juice
1 Tbsp melted coconut oil
1 Tbsp coconut sugar (optional)
8 x 8 square pan
high-speed blender or food-processor


DIRECTIONS:


1.) Preheat oven to 375 degrees.  Soak 1/2 cup apricots with 1/2 cups dates in warm water and set aside.  Boil water for pasta and only cook for half the time it says. Drain, rinse with cold water and set aside.
2.) At this point either make fresh coconut milk by combining the meat and coconut water from a Young Thai Coconut.  If you using from a box simply measure the one cup you need into blender.  Dice the remaining 1/4 cup of apricots and set aside.
3.) Add sweet potato, drained apricots/dates, vanilla, 1 tsp cinnamon, salt, orange juice and coconut oil to the coconut milk in the blender.  Blend until completely pureed.  Feel free to add a bit more liquid if it's too thick.
4.) Add noodles to a big bowl and stir in the delicious coconut/date/cinnamon goodness you just made.  Make sure the noodles are thoroughly coated with mixture.  Add the noodles to your pan that is lightly coated in coconut oil if you wish.  Sprinkle with remaining 1/2 tsp cinnamon and 1 Tbsp coconut sugar.  Cover with foil and bake for 25 minutes.  Remove foil and let brown another 5-10 minutes.
5.) Let cool slightly and cut into 9 squares. Enjoy cold, room temp or hot!


___________________________________________________________________________________________________